Simple Furled Leaders
Simple Furled Leaders Kathy Scott

There are many sources of directions for making good furled leaders, leaders which turn over smoothly, have no memory, can be fished wet or dry, and allow for a season’s worth of tippet changes. I’ve found the greatest personal appeal in the simplicity of the process taught by George Barnes and George Rainville at the Harpswell, Maine, cane rodmakers’ gatherings, demonstrated originally, I believe, by Tom Smithwick. This makes a 10-8-6 thread taper.
MATERIALS:
6/0 waxed Unithread electric drill ½” cup hook (held in drill chuck) six-foot long 2X6 five 3-inch long dowels (3/8” diameter) 3-ounce weight paperclips or S-hooks 3-inch clamp,clothespin assorted pushpins optional - superglue
SHORT VERSION (maybe the most non-technical explanation you’ll ever see):
Number your pegs counterclockwise, with pegs 1 and 5 together at one end and peg 3 at the other end.
Loop the thread over peg 1, wrap it around peg 2 and back to peg 1 two and a half times (makes 5 threads), then continue past peg 3 and on up around peg 4. Reverse direction, coming around the outside of peg 3 and continuing up to peg 2, where you weave through the space between the threads held apart by that peg and return past both pegs 3 and 4 all the way up to peg 5. Wrap 2 1/2 times around peg 5 to peg 4, weaving through the threads at peg 4 both times you go by, and loop off the thread at peg 5. Attach your weight. Put in the pushpin and spin the entire first leg 10% shorter, and secure it. Put in the second pushpin, spin the entire second leg, then slip the loop off that pushpin on to the first pushpin. Maintaining tension, lift the pushpin end upwards and lower the weight. Let spin until done. Secure end loops open.
DETAILED PROCEDURE:
The board I use is a 2X6 about six feet long.
On it, there are five upright pegs of 3/8-inch dowel. Pegs 1 and 5 are mounted at the left as I face the board, about three inches from the end and about three inches apart. (These “abouts” provides a clue as to the forgiving nature of this method.) Peg 3 as I face the board is near the right end.
On the close side of the board, eighteen inches to the right of peg 1 is peg 2. Peg 4 is on the far side of the board, staggered right two feet farther (42 inches below top peg 5). Peg 3 is in the middle and near the very right end of the baseboard.
Think of them in an elongated, sideways U shape. Starting at the left and proceeding right along the board, around the bottom and back to top left, you’d pass pegs 1, 2, 3, 4, and end on 5.
The pegs are about 3 inches tall.
I draw a line across the base board 10% of the distance from the 1/5 pegs to the 3 peg for an easy signal of the eventual length of spun thread for each leg.

I use 6/0 coated Unithread.
Make a simple loop in the thread with an overhand knot.
Loop the thread over the bottom left peg (peg 1), and trim off the tag end of the thread.
Hold the spool in your hand such that you can control the tension on it, and run it from peg 1 along the outside of the board around peg 2 and back to peg 1. Continue around peg 1 and to peg 2 again, keeping tension on the thread, around peg 2, and back to peg 1. Continue around peg 1 and past peg 2 still along the bottom edge of your board.
Go on around the outside of peg 3 and head left along the top edge of your board until you can swing around peg 4 and back again.
Go around the OUTSIDE of peg 3 as you pass by on your run back to peg 2. (If you count, you’ll see five parallel threads spanning peg 1 to peg 2.)
Keeping tension still on the thread, start around peg 2 but go over one side of the threads, drop through the space between the parallel threads where they are held apart by the peg (so that you go under the other side threads) and then head back toward peg 3. (NOTE: Looping through the peg1-peg2 threads ties the rest of your leader into this part.)
Continue along your board toward peg 3, pass by it on the outside (there should be no threads on the inside of peg 3), and follow the top edge of your board all the way left to the end at peg 5.
Go around the outside of peg 5, and head back right toward peg 4.
When you reach peg 4, you’ll need to slip your spool between the strands of thread separated by peg 4, so simply: start around peg 4 over the bottom threads, duck your spool under the top threads, and continue back toward peg 5.

Pass around peg 5 one more time, and back around peg 4 (weaving the spool through your strands again at peg 4 as before), and back to peg 5.
At peg 5, run out your thread eight inches or so and keep it taut while you clip it off the spool. Then you just need to make another loop in your thread with an overhand knot, secure it over peg 5, and trim off the tag end of the thread.
Take a moment to look the whole thing over. Make sure all of the threads are together at each peg, and pushed about half way down the height. Smooth out any tension disparities.

Then attach your weight to the threads at peg 3. I do this by hanging a 3-ounce sinker weight from a paper clip or S-hook looped over the thread. To prevent those threads from jumping off the peg prematurely, I clip the threads (right on them) to peg 3 with a small clamp or clothespin. This also stops the spinning of the thread from traveling around the peg and twisting the other leg. You could use a small piece of masking tape for the same job.

Using a 1/2-inch cup hook in the jaws of a small drill, I hook the top threads of peg 1 only. This will be the first ‘leg’.
Before actually slipping the threads off the peg, I insert a pushpin up next to it to substitute for this peg when I pull off the threads. The pushpin makes a place holder to keep the eventual end loop of the leader open.

Pushpin in place, I use the hook on the drill to slip the threads up off peg 1, maintaining tension. Then I reach down and slip the threads off peg 2, careful to maintain tension as this makes the leg extend a bit.
Always careful to maintain tension (can I mention this enough?), I spin the leg with the drill until it is 10 per cent shorter, about at that line I drew. To check the tension, I tap the spinning threads now and again lightly with a finger. When I reach the line, I push the point of the pin into the board at the line (or near it), and slip out my drill hook.
The process of spinning the second leg from peg 5 is much the same. With a pushpin marker in place, lift the threads off peg 5 and maintain tension on the threads while reaching down and lifting the thread off peg 4, too. Then spin the leg until it matches the other in length.
At this point, pull the pushpin away from the drill’s hook about a half inch to make a convenient little gap, and loop the end of this leg over the first pushpin so that it lies secured with your first leg. Remove the second pushpin and the drill’s hook.
Lying before you should be two legs together, secured with a single pushpin at one end and clipped over peg 3 and weighted at the other end, butt and tip, respectively.
Here’s the best part. Slide the furling board off the table so that it is tilted on to the floor, weighted end of the leader down. Unclip the clamp. Lift up the pushpin end of your work (keeping the threads very taut) and walk the leader off the board. Do not touch the floor with the spinning weight or lose tension; raise the pushpin end high. The leader will twist, furling itself before your eyes, unless you touch it on your clothing or tangle it in your hair/shirt/dog. Either hold it until it reverses direction, spins the other way, reverses, and finally stops, or just stick the push-pin in a handy doorjamb and let it furl away while you do something else.
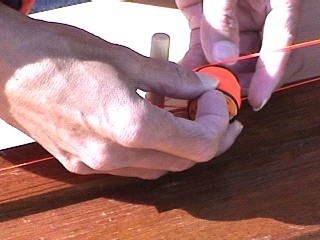
After the new leader has settled down a bit, I take it off the pushpin and use a dot of superglue to hold the loop open, or interweave it in a Shorb knot to create a furled end-loop. For fishing, we use short loop-to-loop connectors so the tippet and line attach easily.